
Your First Layout
This walkthrough builds a small layout from an empty board to a printed plan. Allow about fifteen minutes.
1. Create a layout
Choose File → New. A sheet asks for the choices that shape everything else. All of them can be changed later.
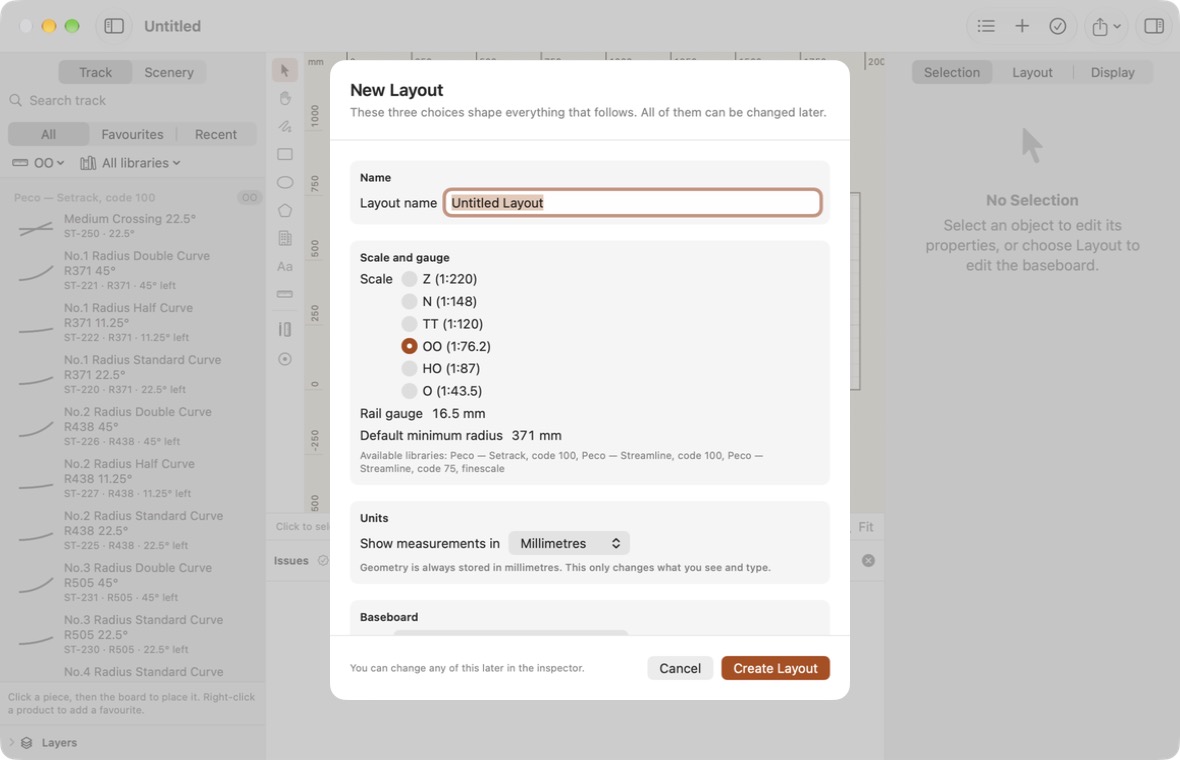
| Setting | What to choose |
|---|---|
| Layout name | Anything you like. It appears on printed plans. |
| Scale | The scale you model in. The sheet shows the rail gauge, a sensible default minimum radius, and which track libraries are available for that scale. |
| Show measurements in | The units you want to see and type. Geometry is always stored in millimetres, so changing this later never alters the layout. |
| Baseboard | Pick a preset such as Door plank or 8 × 4 ft board, or choose Custom… and enter a width and height. |
Click Create Layout. The canvas shows your empty board with a grid and rulers.
2. Choose a piece of track
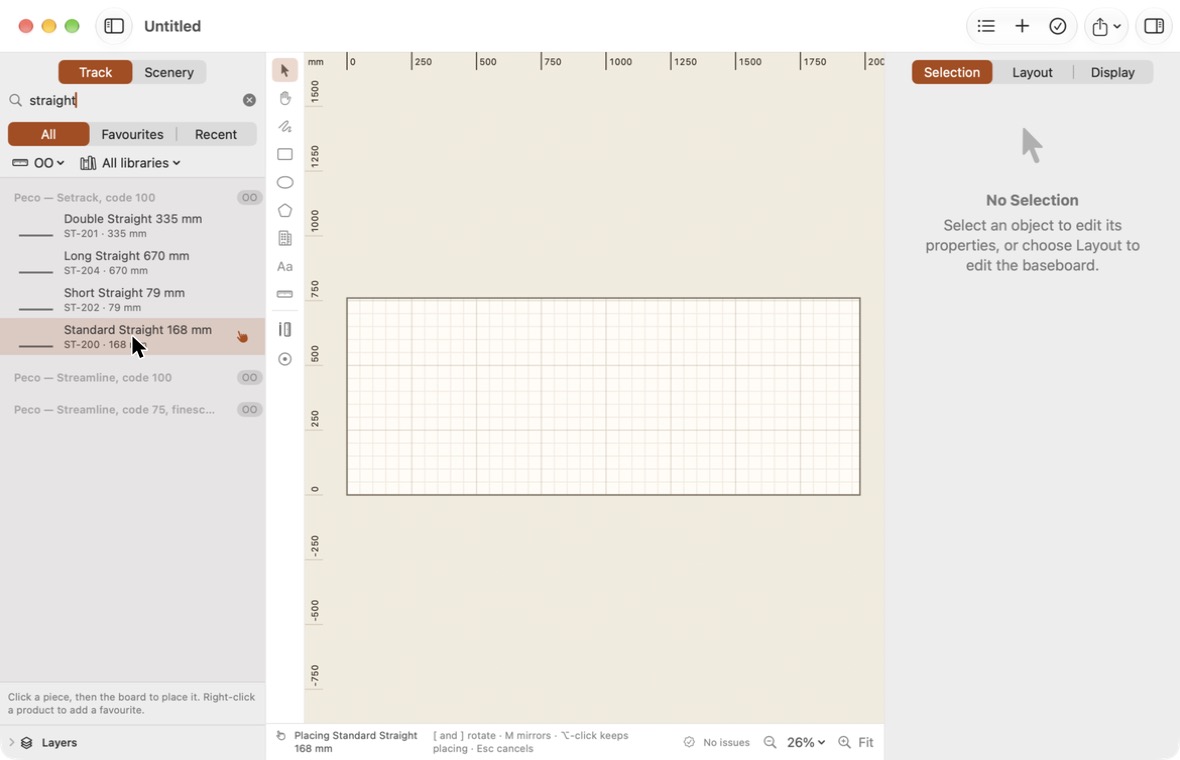
The drawer on the left is the catalogue. With Track selected at the top, find the piece you want. Typing in the search field narrows the list by name or product code.
Click a piece to arm it. The status line under the canvas confirms what you are placing and reminds you of the keys that apply.
3. Place it
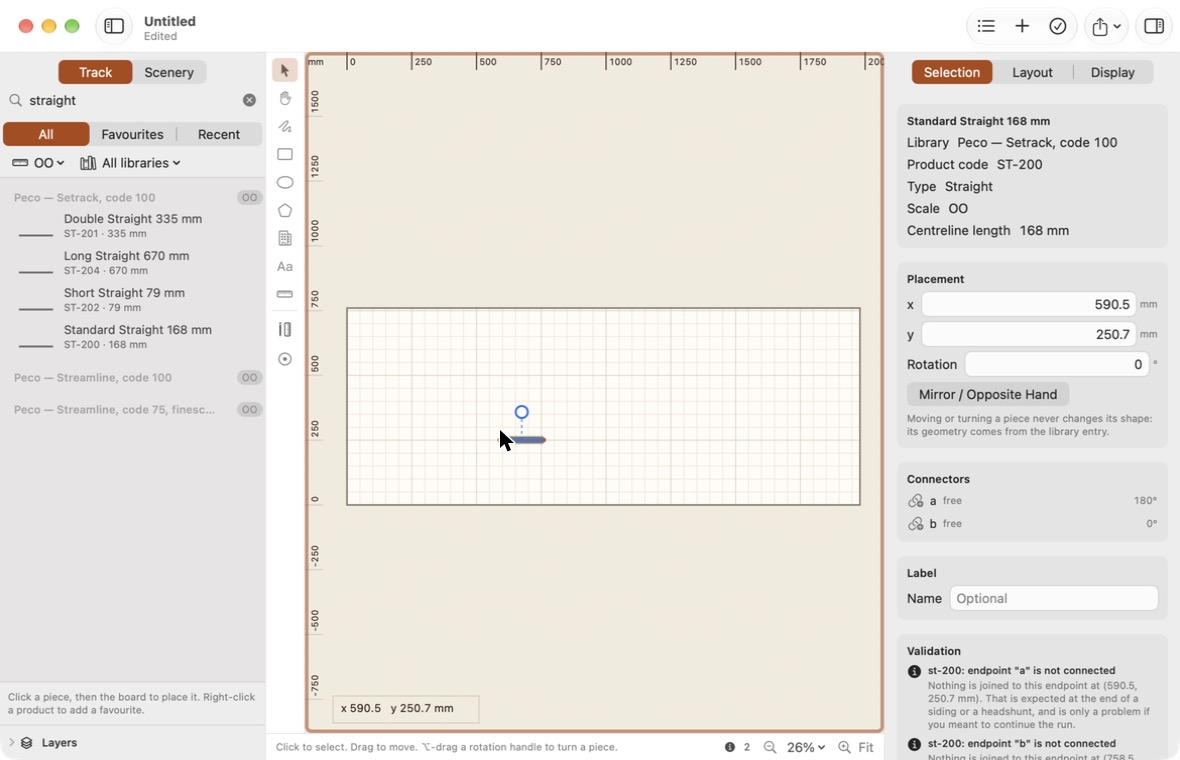
Click on the board. The piece lands where you clicked and is selected, so the inspector on the right shows its details: the library it came from, its product code, its length and the state of each connector.
Laying a run quickly
Hold ⌥ Option as you click to keep the same piece armed, then click again for the next one. Press Esc when you have finished.
Before you click, you can turn the piece with [ and ] (22.5° at a time; hold ⇧ Shift for 1°) or mirror it with M.
4. Join the next piece
Arm another piece and bring it near a free end of the first. Gauge Buddy offers the joint, and when you click, it places the new piece so the two connectors meet exactly.
You do not need to line pieces up by eye. Get close, and the app does the arithmetic. Sixteen 22.5° curves laid this way close into a true circle.
If the app declines a joint, it tells you why. Usually the piece needs turning round, or the two pieces are different gauges. See Track.
5. Add flexible track
Choose a flexible track product in the catalogue, then drag on the board from where the run starts to where it ends. Drag the handle in the middle to bend it into a curve. The inspector shows the length and the tightest radius as you go. More in Flexible Track.
6. Add scenery
Switch the catalogue to Scenery. Pick a tree, a building, a platform or a road, and click the board to place it. Each item is the right size for your scale. More in Scenery.
7. Check for issues
Click the tick or warning symbol in the toolbar to open the issues list beneath the canvas. Warnings are worth fixing. Notes, such as the open end of a siding, are there so that nothing surprises you. More in Checking Your Layout.
8. Save
Choose File → Save and pick a name and location. Your layout is saved as a .railplan file. See Saving & Sharing Layouts.
9. Print or export
Choose File → Print Layout (⌘P). Full size tiles the plan at 1:1 across numbered pages so you can lay the paper on the board; Fit to one page gives an overview. Read Printing a Plan before you cut anything from a printout.
Where next
- A Tour of Gauge Buddy explains every part of the window.
- Selecting & Editing covers moving, rotating, copying and precise placement.
- Baseboards shows how to build an L-shape or add an operating well.