
Layers, Groups & Assemblies
Three tools keep a large layout manageable: layers decide what is visible and editable, groups keep related objects together, and assemblies let you reuse an arrangement in other layouts.
Layers
Click Layers at the bottom of the catalogue drawer to open the layer list.
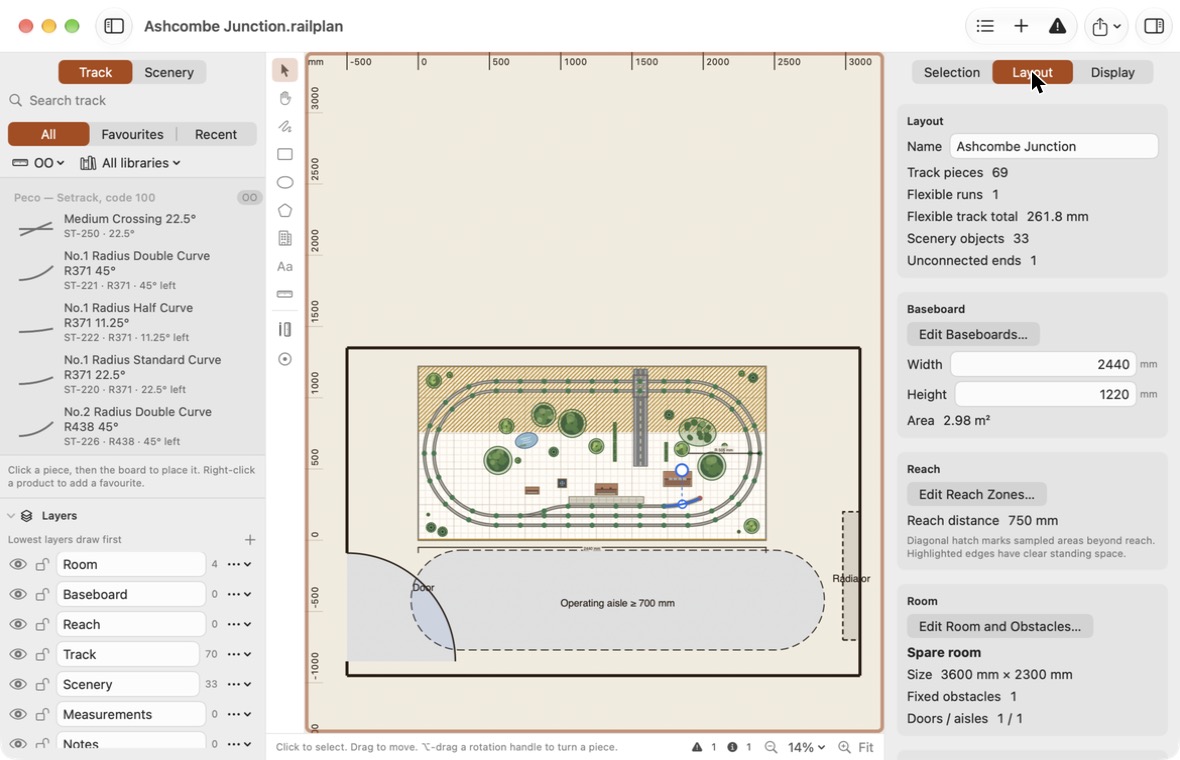
Every layout starts with built-in layers for the room, baseboard, reach map, track, scenery, measurements and notes. Each row shows the layer's name and how many objects are on it.
| Control | What it does |
|---|---|
| Eye | Shows or hides the layer. Hidden objects cannot be selected. |
| Padlock | Locks the layer so its objects cannot be selected or changed. |
| Name | Rename a layer by typing. Press Return to keep the name. |
| ⋯ menu | Draw Earlier and Draw Later change the drawing order. Custom layers can also be removed here. |
| + | Adds a layer of your own. |
Layers lower in the order are drawn first, so later layers appear on top. The order also decides which object is picked when two overlap.
Moving objects between layers
Select the objects and choose a layer from the Layer menu in the inspector, or right-click and choose Move to Layer. Several objects can be moved at once, as a single step you can undo.
Removing a layer
Choose Remove Layer… from a custom layer's menu. You are asked which layer its objects should move to. Nothing is deleted. Built-in layers cannot be removed.
Layers when printing and exporting
Print and PDF export let you choose exactly which layers to include, starting from the ones that are visible. See Printing a Plan.
Groups
A group is a named set of objects that behaves as one.
| To | Do this |
|---|---|
| Create a group | Select the objects and choose Layout → Group Objects (⌘G). |
| Name a group | Select it and type a Group name in the inspector. |
| Break a group up | Layout → Ungroup Objects (⇧⌘G). |
Clicking any member selects the whole group. Moving, rotating, duplicating, copying and deleting all act on the group and keep its members in the same arrangement.
Things to know:
- Grouping a group with other objects merges them into one group. Groups do not nest.
- To change one member's shape or position on its own, ungroup first.
- If any member is on a hidden or locked layer, the group cannot be selected or moved. Show and unlock its layers first.
- The object list searches group names.
Selecting connected track
Select any piece of track and choose Layout → Select Connected Track. The selection grows along every joint until it reaches an open end or a hidden or locked piece.
Only real joints count. Track that merely passes close by, or crosses over, is not included.
This is the quick way to select a whole circuit or yard before grouping it, moving it or saving it as an assembly.
Reusable assemblies
An assembly is a saved selection you can drop into any layout: a station throat, a fiddle yard, a favourite crossover.
Choose Layout → Reusable Assemblies.
| To | Do this |
|---|---|
| Save an assembly | Select the objects, open the sheet, give it a name and click Save Selection. |
| Use an assembly | Select it in the list and click Insert. A copy is placed at the centre of the canvas. |
| Remove an assembly | Select it and click Remove. Copies already placed in layouts are not affected. |
An assembly remembers its groups and carries the track libraries it needs, so it works in a layout that has never used that track before. Inserting is a single step you can undo.
Things to know:
- Assemblies are saved on this Mac, not inside a layout file. They do not travel with a layout you send to someone else, though anything you have inserted does.
- Each inserted copy is independent. Changing one does not change the others or the saved assembly.
- An assembly is not resized for a different scale. Insert an OO assembly into an N layout and it stays OO-sized, and the usual scale checks apply.
- You can keep up to 32 assemblies.