
Printing a Plan
Gauge Buddy prints your layout as a vector plan: either at full size, tiled across as many pages as it takes, or as an overview on a single page.
Choose File → Print Layout (⌘P).
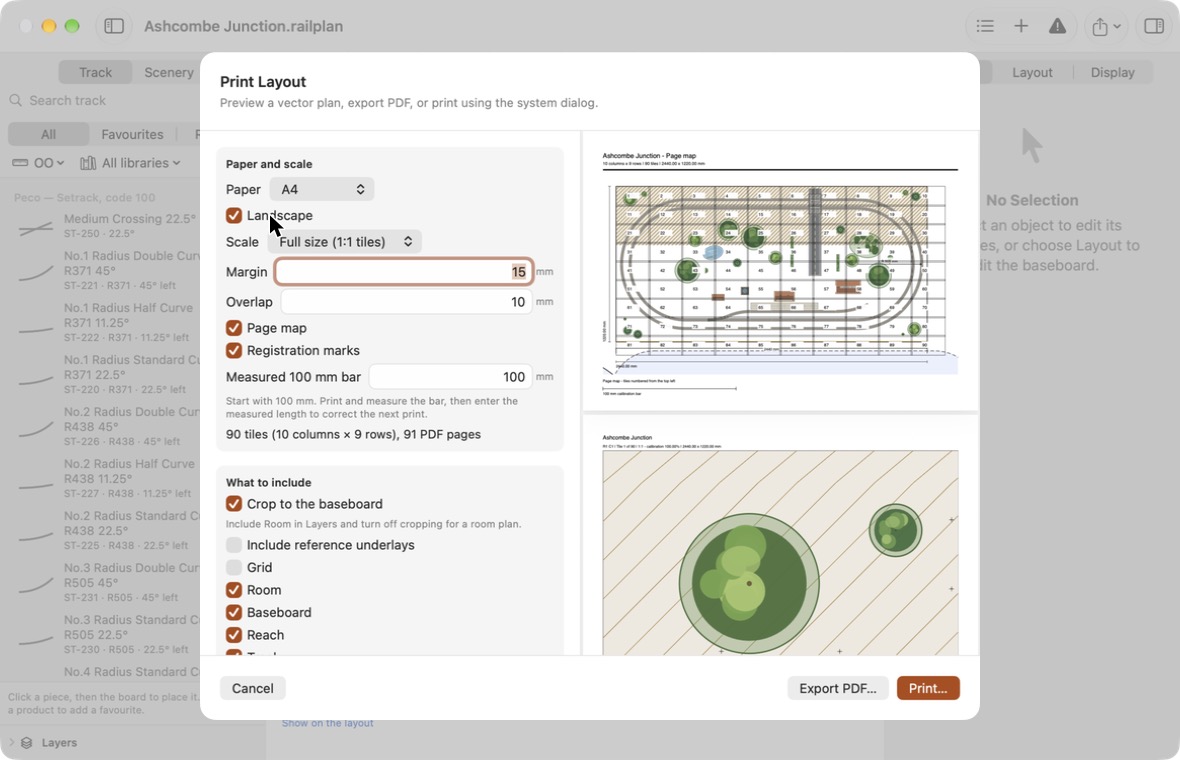
The preview on the right updates as you change options. On a large layout it can take a moment; Export PDF… and Print… become available when it is ready.
Paper and scale
| Option | Meaning |
|---|---|
| Paper | A4, A3 or US Letter. |
| Landscape | Turns the paper sideways. |
| Scale | Full size (1:1 tiles) or Fit to one page. |
| Margin | The unprinted border, from 5 to 50 mm. Set it to at least your printer's unprintable area. |
| Overlap | How much neighbouring tiles share, from 0 to 50 mm. |
| Page map | Adds a first page showing how the tiles fit together. |
| Registration marks | Adds matching crosses in the overlaps for lining tiles up. |
The sheet shows how many tiles and pages the plan needs. Larger paper or landscape orientation often reduces the count.
Full size
Full size prints the plan at 1:1, so you can lay the paper on the baseboard and work from it directly.
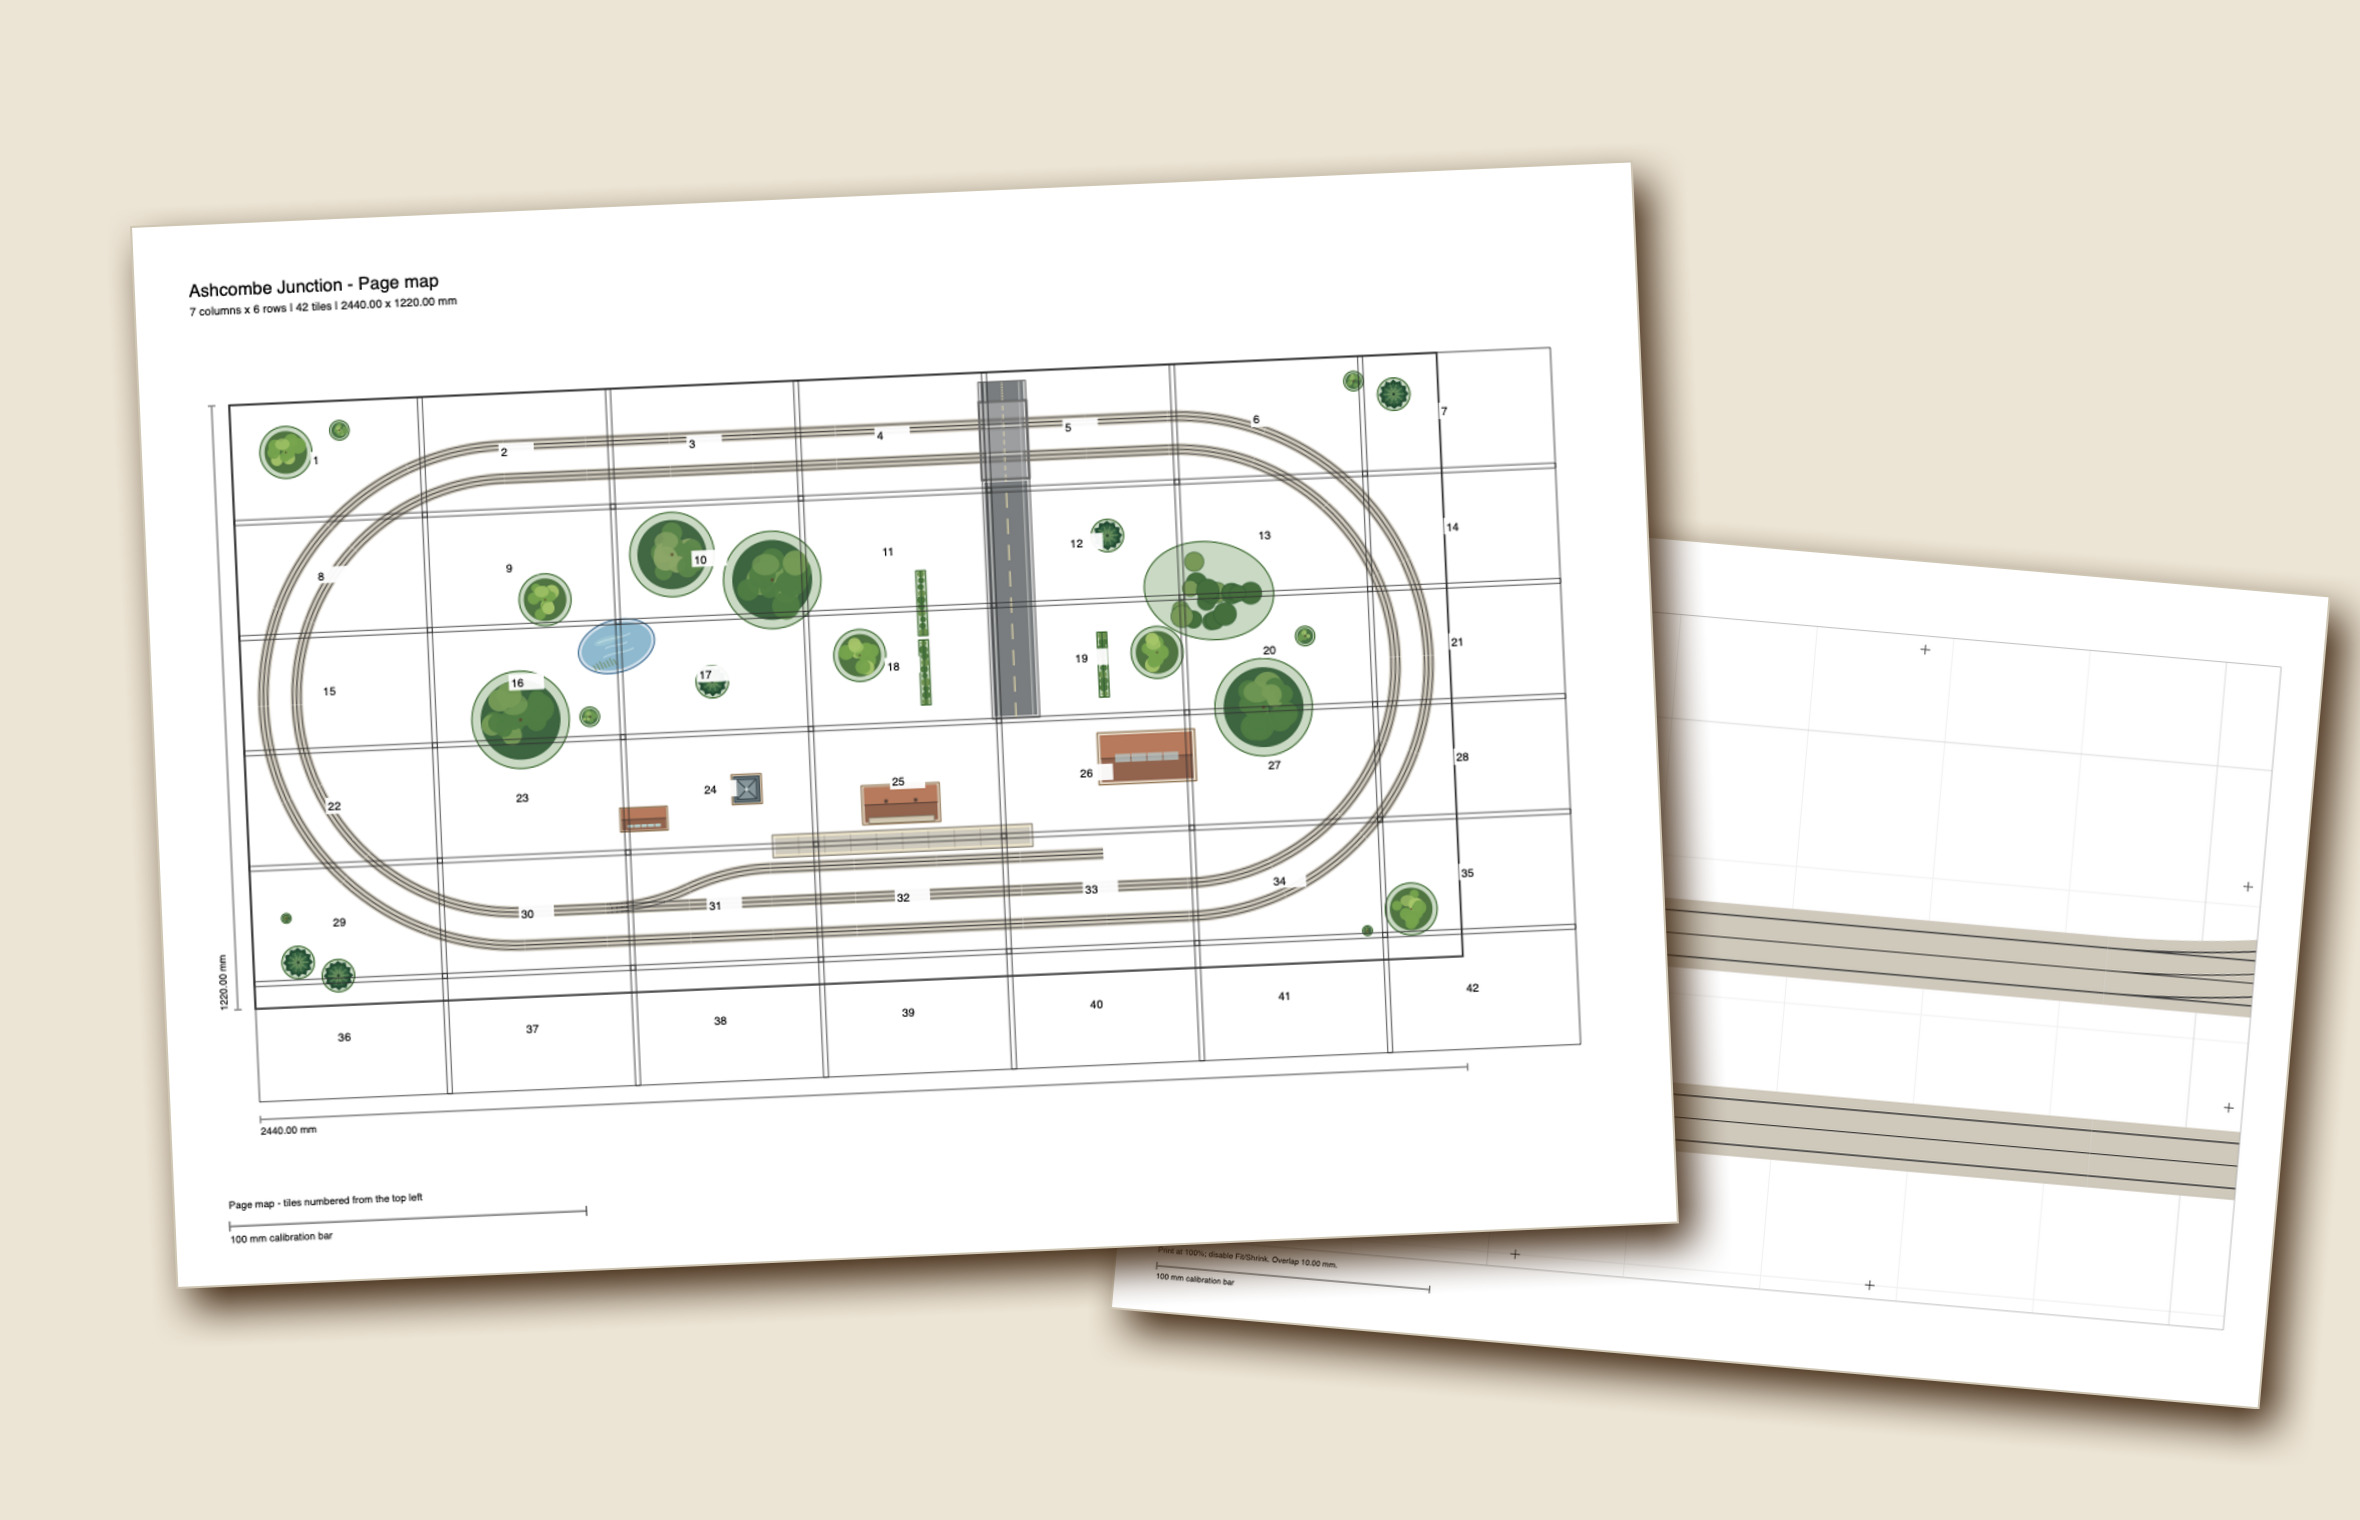
- Tiles are numbered from the top left: R1 C1, R1 C2 and so on along the first row, then the next row.
- The page map shows every tile's position and the overall dimensions.
- Each tile is labelled with its position, the layout name and the scale.
Assembling the tiles
- Lay the tiles out in order using the page map.
- Overlap neighbouring tiles until the registration crosses sit on top of each other.
- Tape them together. Trim or overlay the overlapping edges; do not butt the outer edges of the paper together.
With an overlap of 0 there are no crosses, and tiles meet edge to edge.
Getting the size right
Printers do not all print at exactly 100%. Every page carries a 100 mm calibration bar so you can check.
- In your printer's dialog, print at 100% with any Fit to page or Shrink option turned off, on the same paper and orientation as the preview.
- Print one tile and measure the calibration bar with a steel rule.
- If it is not 100 mm, type what you measured into Measured 100 mm bar and print again. Gauge Buddy scales the plan to compensate. Corrections of up to 10% either way are supported.
- Measure the bar on the corrected print before relying on it.
Measure before you cut
A printed plan is only as accurate as the printer. Always measure the calibration bar on the pages you are going to use before cutting baseboard or laying track from them.
Fit to one page
Prints the whole layout on a single sheet with its scale ratio shown. There are no tiles, registration marks or page map, and the printer correction does not apply.
What to include
| Option | Meaning |
|---|---|
| Crop to the baseboard | Prints just the board. Turn it off to include the room. |
| Include reference underlays | Prints reference images. Off by default. |
| Grid | Prints the grid. |
| Layers | Tick each layer you want. The list starts with the layers currently visible, but you can include hidden ones. Locked layers print normally. |
Dimensions print when the Measurements layer is ticked.
Printing and saving
- Print… opens the standard macOS print dialog.
- Export PDF… saves exactly what the preview shows. Take this to a print shop for large-format printing.
If the layout has warnings, the sheet reminds you before you print, and the PDF records the state of the checks.
Very large plans
A plan needing more than 400 tiles cannot be printed at full size. Choose larger paper, or use Fit to one page.