
A Tour of Gauge Buddy
Each layout opens in its own window. The window has four working areas, and you can show or hide three of them to make room for the canvas.
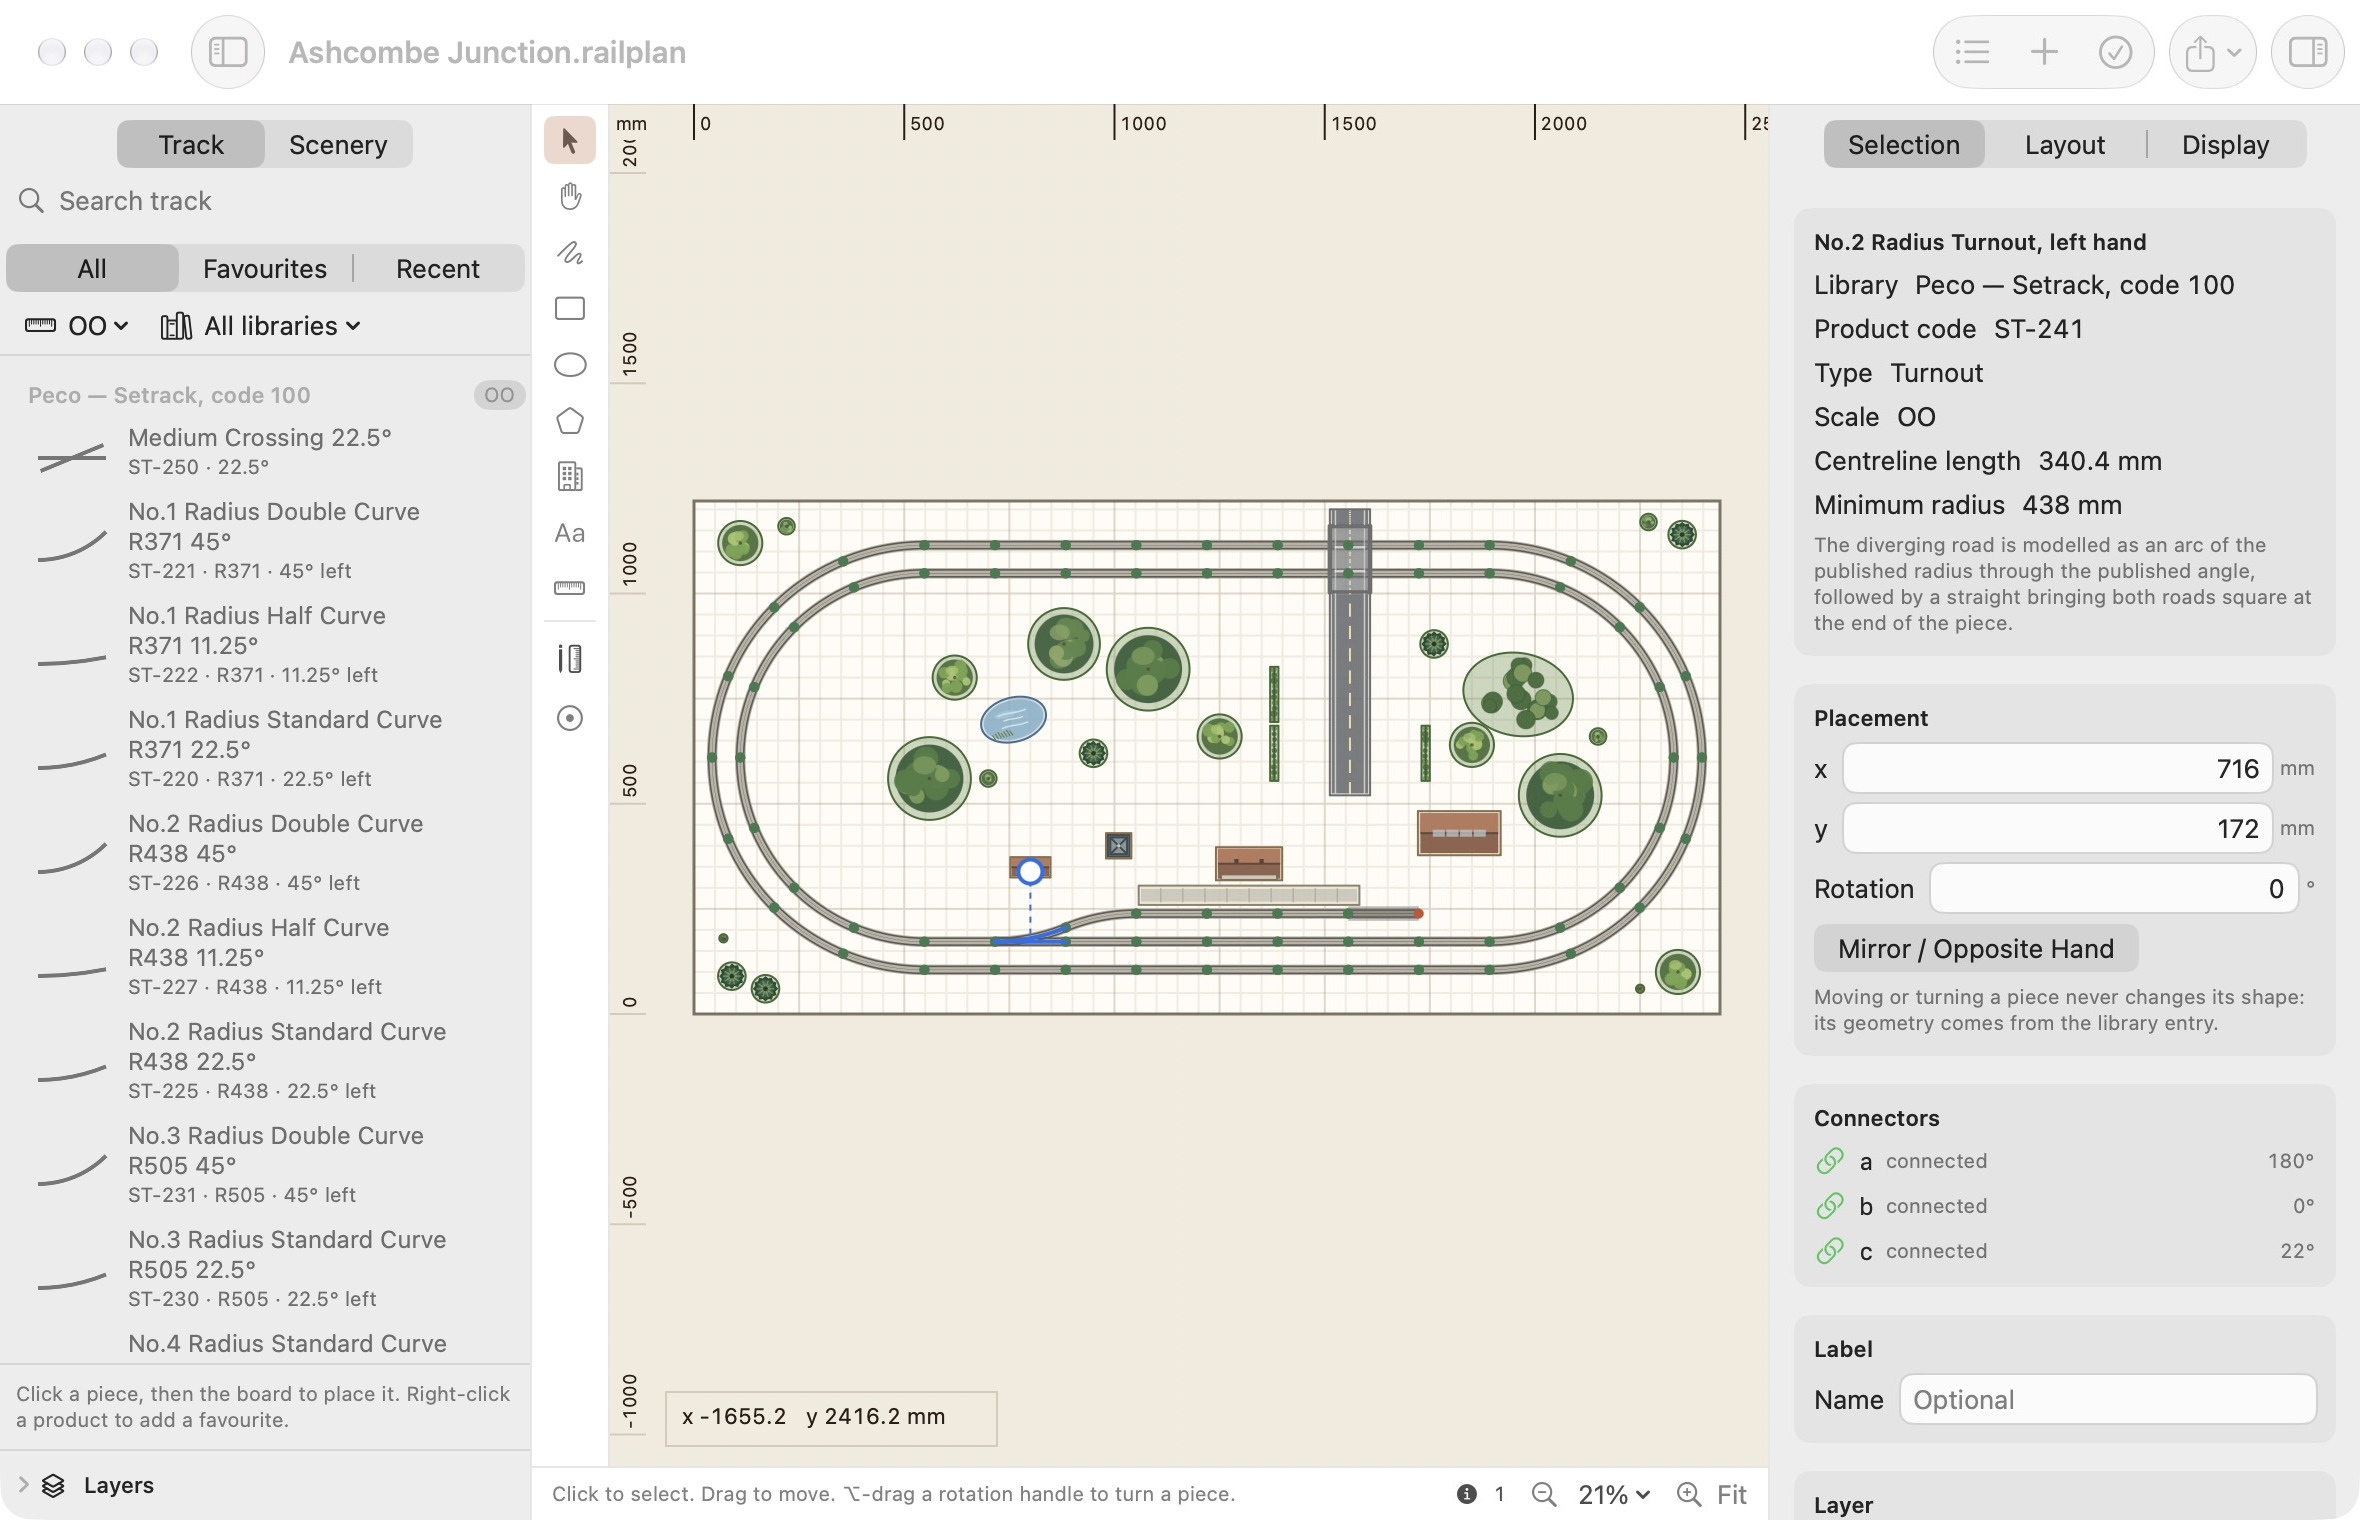
| Area | Where | What it is for | Show or hide |
|---|---|---|---|
| Catalogue | Left | Track and scenery to place, and the layer list. | ⌥⌘L |
| Canvas | Middle | The plan itself, with rulers, the tool strip and a status line. | Always shown |
| Inspector | Right | Details of whatever is selected, the layout's settings and display options. | ⌥⌘I |
| Issues | Under the canvas | Problems and notes found in the layout. | ⌥⌘V |
Drag the dividers between areas to resize them. Gauge Buddy remembers their sizes and whether they were open.
The catalogue
The picker at the top switches between Track and Scenery.
On the Track side:
- The search field matches names and product codes.
- All, Favourites and Recent choose which pieces are listed. Right-click a piece to add or remove a favourite. Recent remembers the last twelve pieces you armed.
- The two menus below filter by scale and by library, so you can look at one track system at a time or all of them.
- Resting the pointer on a piece shows its full name, its figures, what it joins to, and how many of a curve make a circle.
The Scenery side lists trees, lineside structures, roads and bridges at the right size for your scale. See Scenery.
At the bottom of the drawer, Layers expands to show the layer list. See Layers, Groups & Assemblies.
The tool strip
The strip down the left edge of the canvas holds the tools. Press the number shown to choose one, or rest the pointer on a tool to see what it does.
| Key | Tool | What it does |
|---|---|---|
| 1 | Select | Click to select, drag to move. ⌥-drag a rotation handle to turn a piece. |
| 2 | Pan | Drag to move around the layout. Holding Space pans with any tool. |
| 3 | Flexible Track | Drag to lay a flexible run, then drag its middle handle to curve it. |
| 4 | Rectangle | Drag to draw a rectangular area. |
| 5 | Ellipse | Drag to draw a round or oval area. |
| 6 | Polygon | Click each corner, then press Return to finish. |
| 7 | Building Footprint | Drag to draw a building. Buildings are checked against one another. |
| 8 | Text Label | Click to add a label. |
| 9 | Measurement | Drag between the two points you want to measure. |
Below the tools, the Construction button switches the canvas to placing and adjusting dimensions and reference images. See References & Dimensions.
The canvas
- Rulers along the top and left show positions in your chosen units. Zero is the bottom-left corner of the board.
- The status line underneath describes the current tool, or the piece you are placing.
- At the right of the status line are the issue counts, the zoom menu and Fit.
| To | Do this |
|---|---|
| Zoom to fit the whole layout | ⌘0, or click Fit |
| Zoom to fit the selection | ⇧⌘0 |
| Choose a zoom level | Use the percentage menu under the canvas |
| Pan | Hold Space and drag, or use the Pan tool |
At 100%, one point on screen is one millimetre on the layout. It is a drawing scale and does not depend on the size of your display.
The zoom menu also offers Saved Views. Save Current View stores where you are looking so you can return to it; up to ten are kept per layout. Saved views stay on this Mac and do not travel with the file.
The inspector
The inspector has three tabs.
| Tab | What it shows |
|---|---|
| Selection | The selected object: its product, exact position and rotation, connectors, name and layer, and any issues that concern it. |
| Layout | The layout's name and totals, its scale, display units and minimum radius, Snap to grid, the baseboard size, and buttons for baseboards, reach zones and the room. |
| Display | Whether the grid, rulers, part labels and track connectors are drawn. |
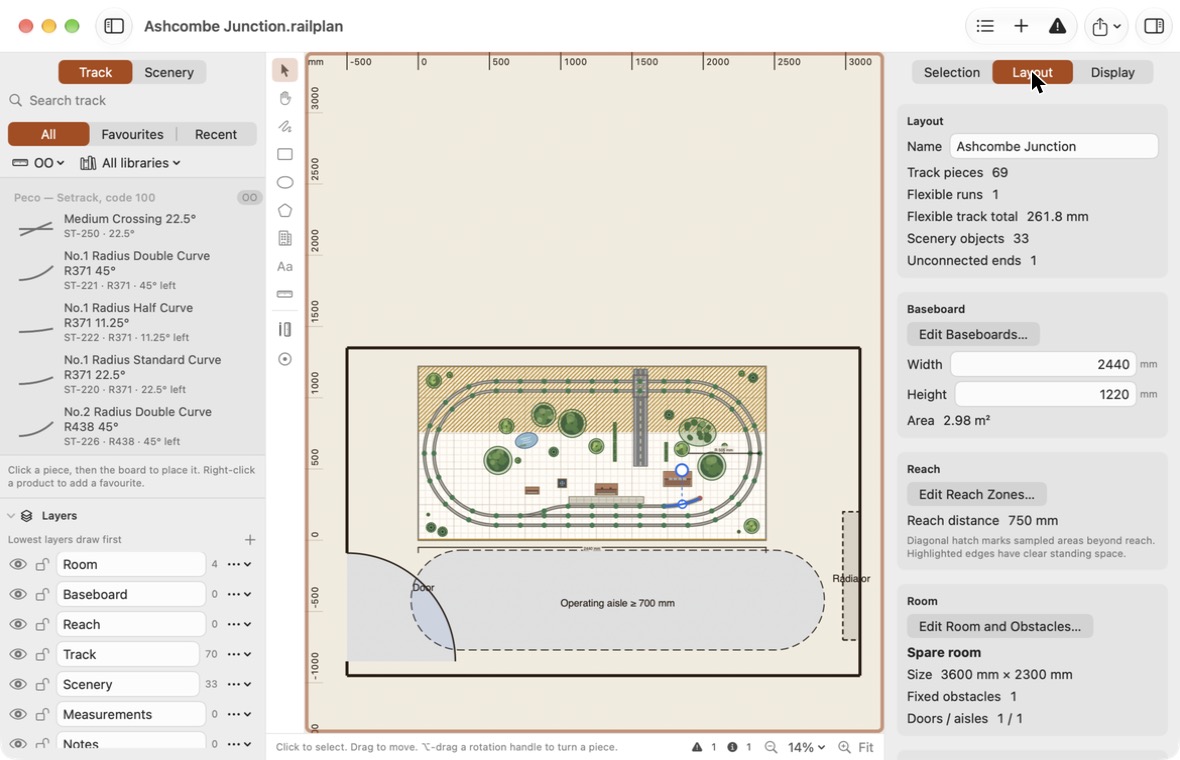
Numeric fields accept exact values. If you type something the app cannot use, the field explains the problem and the layout is left unchanged. Press Esc to abandon an edit.
The toolbar
| Button | What it does |
|---|---|
| Library (left) | Shows or hides the catalogue drawer. |
| Objects | Opens a searchable list of everything in the layout. |
| Place Track | Opens precise placement. |
| Issues | Shows or hides the issues list. The symbol changes to a warning triangle when there is something to look at. |
| Export | A menu of export formats. |
| Inspector | Shows or hides the inspector. |
Control-click the toolbar to customise it. Everything in the toolbar is also available from the menus.
The menus
| Menu | What you will find |
|---|---|
| File | New, open, save, Export and Print Layout. |
| Edit | Undo, redo, cut, copy, paste, delete, select all. |
| View | Show or hide panels, grid, rulers, labels and connectors; zoom; the object list. |
| Libraries | Import a track library, and manage libraries stored in this layout. |
| Tools | The same tools as the tool strip, plus Construction. |
| Layout | Baseboards, room, reach zones, flex construction, purchasing, dimensions, groups, assemblies, precise placement, rotate and mirror. |
| Help | Opens this documentation in your browser. |
Undo
Almost everything you do can be undone with ⌘Z and redone with ⇧⌘Z. Changes made in a sheet, such as editing baseboards, are applied as a single step when you click Apply, and discarded if you click Cancel.